Monday, September 10, 2018

Should We Teach the "Rules" of Photography to Beginners?

The other day my friend, Bill, sent me this article - 5 Rules in Macro Photography and When to Break Them. I have been doing a bit of macro work lately, so he decided to share the article. He sent it to me via Facebook Messenger and, after I read thru it, we had a brief discussion about it. The article, and discussion, lead me to writing this blog post. I have seen countless articles with the same message - "here are the rules, you should always follow them unless you should break them." There is always an exception to the rule and, in photography, there seem to be more exceptions than rules.
To consult the rules of composition before making a picture is a little like consulting the law of gravitation before going for a walk. – Edward Weston
This is one of my favorite quotes and I think it is appropriate here. I'm not saying that the "rules" aren't important - they are, to an extent - but I am wondering about when they should be taught. I have seen many photographs that were technically spectacular and, yet, dull and lifeless. When I say "technically spectacular" I mean they followed the rules. I know, part of the rule is knowing when to break it but do most photographers learn this second part? When do you start to teach them to break the rules? Should we call them something other than "rules"?
The photographs that excite me are photographs that say something in a new manner; not for the sake of being different, but ones that are different because the individual is different and the individual expresses himself. - Harry Callahan
Bill and I came to an agreement that the rules should be taught but later in a photographers development cycle and maybe not be called rules at all. I think if we teach how someone looks at a photograph, how the eyes scan and are drawn to certain things, how the relationship between light and dark works; then the student will simultaneously learn the rules and the exceptions. They will know the "why" which is far more important than the "what", in my opinion anyway. Photography, after all, is art - right? Art is a means of self-expression and who is to tell us how to express ourselves?
I don’t think there’s any such thing as teaching people photography, other than influencing them a little. People have to be their own learners. They have to have a certain talent. – Imogen Cunningham
It's all about capturing a moment in time as witnessed by the photographer. We all see things differently and every scene means something different to us. I have met some photographers who are very much into following rules and the "technical" aspect of photography; their work is nice but can be a bit boring. I had one lament about how lazy and stupid some people were because they didn't know how to read a histogram! I told him that I didn't always consult the histogram when I was out shooting and he became insulting. I ended the conversation when I asked him about consulting the histogram when you shoot film.... So, am I saying that we should throw caution to the wind and not learn the "rules" of composition? No, not really. I just think that maybe we should de-emphasize them or teach them a different way. The word "rule" implies rigidity and we should be emphasizing creativity. I know, there are times when the rules much absolutely be followed, without exception. Sure, there are disciplines within photography where certain rules must be followed but I am talking about those learning the craft; there is plenty of time for specializing.
You don't make a photograph just with a camera. You bring to the act of photography all the pictures you have seen, the books you have read, the music you have heard, the people you have loved. - Ansel Adams
I think this is a good place to end. What do you think about teaching the rules to beginner photographers? Are you a teacher? What is your approach? I would love to hear your thoughts - leave me a comment below.

Until next time, get out, enjoy nature and break a few rules!

Monday, August 27, 2018

Product Review: Vello Macrofier for Canon EOS (UPDATED!)

Vello Macrofier

This review is not sponsored, nor is it commissioned by the manufacturer. I requested, and received, the equipment for the purpose of producing a review on my YouTube channel - you can check out the review here.

What is it?

The Macrofier is a third-party lens accessory made by Vello (http://www.vellogear.com/) for use with the Canon EF/EF-S lens systems. It can be be used as a set of automatic extension tubes or a lens reverse-mount system; both are a means of achieving macro photography with non-macro lenses or to achieve greater magnification with macro lenses1.

When you reverse-mount the lens you can get incredibly close, as you can see in the first image. This is a Canon 18-135mm EF-S lens reverse-mounted. The inscription on the lens states the closest focusing distance is 1.5 feet (.45 meters) but with the lens reversed I am just an inch or so away. Extension tubes work in the same way - by moving the lens away from the camera body you can achieve closer focus.

First Impression

When I opened the box I wasn't quite sure what to expect - I had seen the product photos on B&H and the Vello website but, often, the product doesn't necessary live up to it's "image." I was pleasantly surprised to find it was exactly what I saw in the pictures. It appeared to be well-made and sturdy. It comes with seven (7) adapter rings (52 mm, 58 mm, 62 mm, 67 mm, 72 mm, 77 mm, 82mm) to fit just about any lens you may have. The Macrofier, itself, is packaged in a bubble-wrap bag inside the box. The one thing I noticed was that there were now caps for the device - this isn't a big deal but I was a little surprised. I just ordered a body cap and lens cap to put on it when it is stored in my bag. The rings are solid and flat - I mention that because I have purchased other adapter rings in the past that were not quite flat and were difficult to use.

In The Field

Extension Tubes

I looked in the owner guide and website but could not find a definitive answer to the question - How much extension do you get? I was able to find a review on the B&H website where a reviewer reported that, by his calculations, it is about 35mm. Using the Macrofier as a set of extension tubes couldn't be easier - using the threaded ends, you just screw the two halves together, mount one end on the camera body and the lens on the other end. You can also mount the Macrofier on the lens, then mount the assembly on the camera - doesn't really matter. When using extension tubes, you can (probably) get away with hand-holding but I would suggest using a tripod whenever possible. Macro photography produces notoriously shallow depth of field and trying to hold steady is difficult, at best. That said, I have successfully hand-held with the extension tubes.

Reverse-Mount

For me, this is where the fun really begins and you will definitely want to use a tripod. To use the Macrofier to reverse-mount your lens, the two parts have to be separated. Mount the one end on the camera body, screw the appropriate adapter ring onto the half attached to the camera, screw the lens onto the adapter and, finally, attached the second half of the Macrofier to the back end of the lens. This will allow you to work incredibly close to your subject - depending upon the lens. You can see in the initial image that I am about an inch (or less) from the mushroom which will give you more of an "abstract" image, as shown in the image to the left. Working outside at this magnification can be more than a bit tricky because you are battling the elements. Your depth of field is virtually non-existent and so even the slightest movement will kill the image; it took a while for this mushroom to stop moving despite a nearly imperceivable breeze.

I set up a light tent in my studio to do some macro work. You can read more about this session here - Equipment Review: Vello Macrofier for Canon EOS. Working under studio conditions is much easier because you have full control over everything and can take a long as you need to set up and execute a shot.

Final Thoughts

If you have been wanting to get into macro photography and couldn't justify the cost of the macro lens, spend $99.95 and buy a Macrofier. I promise that you will be happy with your decision. I am very happy with the Macrofier and have a lot of work planned for it. The auto-focus works, though it can be difficult at times which is a function of the lens, and the auto-exposure is good, too. It is well-made, solid and ridiculously easy to use. The only "negative" thing I can say is that I am upset that I didn't get one years ago! Yes, I mean that. I have been wanting a true macro lens for quite a while but the price made them a low-priority. I would, still, like to have a true macro lens (or two) some day but for the foreseeable future the Macrofier is all that I need.

I have also used some of my older Canon FD lenses - everything is manual but works just as well. I am able to do this because I bought a lens attachment a few years ago that allows me to mount my FD lenses on my EOS Rebel T3i.

If you own a Nikon, or other brand, you cannot use the Macrofier as-is; it is only available for Canon EOS line of cameras. If you do own a different brand, you may want to buy a Canon-to-brand X adapter which should allow you to use the Macrofier as a reverse-mount device - you would need two (2) adapters to use it as an extension tube. If you do this, you do so at your own risk - I have not tested this, nor have I found evidence of anyone else doing it. I have no idea if it will work but, in theory, it should.

For More Information & Where To Buy

So, there you have it. If you would like more information on the Vello Macrofier, you can check out their website - click here. While you are there, check out the other accessories that Vello makes, including their "lens adapters" that may allow you to use the Macrofier with your other brand, as described above.

You can also check it out, and purchase it, at B&H Photo - click here.

UPDATE

After I wrote this review I recorded a YouTube review, at one point demonstrating the Macrofier. I experienced a bit of trouble mounting and removing the device from the camera. I later discovered that a screw was loose and the head was slightly above the service of the mounting plate. I was able to secure it and it seems to be okay. I reported this to the manufacturer and asked if this was a common complaint - the response was that this was the first instance they had heard of. They offered to replace the device with a new one - since I was able to tighten the screw myself I declined, in part because I want to see if it happens again.

I believe this to be an isolated incident and it in no way changes my overall opinion or recommendation of the Macrofier. The YouTube review can be seen here - https://www.youtube.com/watch?v=v-qJJ4Tb0h4&t=1s


All photos are copyright Joseph S. Valencia All Rights Reserved They may not be used in any way without express written permission of the photographer. If you wish to use any of the photos you may contact the photographer at valencia32photo@gmail.com


End Notes

  1. I have not tested this equipment with "macro" lenses and have no first-hand knowledge of their performance with this accessory.


Monday, August 13, 2018

Sunset in Spring Lake

The weather has been so bad lately - very hot and so humid it was tough to breathe - and I had gone a while without doing much "real" shooting. Last Thursday I caught a break - still not a great day but the best we had experienced in a while - and I decided to go out to catch a sunset. I thought about going to Maclearie Park but then remembered a friend telling me about St. Catharine Church in Spring Lake. I had driven by there a few times in the past but never thought about it as a sunset location but if Dave said it was good, I was going to check it out.

The decision to shoot that night was a last-minute one and it gave me only about 10 minutes to find a composition and set up before sunset. If I were going somewhere familiar, like Maclearie Park, this wouldn't have been too bothersome but I had no idea what I was going to find when I got to this site. Under normal circumstances I would like to have arrived 45 minutes to an hour before sunset so that I can explore the area and find the perfect spot. Heck, even in a familiar spot I get there early because you never know.... Anyway, I got to the lake and parked on the east side of the lake, almost directly across from the church. I knew I wanted the church in the image but struggled to find a composition that I liked. I like to find some foreground interest - typically a tree - when I shoot a sunset but there was just nothing there for me to put in the frame. The trees were either massive, therefore blocking the sunset, or not in a good place. I quickly gave up and decided to get close to the edge of the lake and use reflections as my foreground.

What cloud cover there was turned out to be quite fleeting but it stuck around long enough to get a few good images. Once the sun set I got in a little tighter on the church and it's reflection in the lake. I also started working with some longer exposures to try smoothing out the water. Overall I am happy with the way the church appears, although I wish it had been lighted a little earlier; it is a little darker in the first image than I would have liked.

Once I was done with the church I turned my attention to the north and the fountain in the lake. It was getting dark and I knew I could get some rather lengthy exposures. I liked the addition of the footbridge but wasn't sure how well it was going to stand out - it is a dark color and in an area with a lot of big trees. The image shown here is one of several compositions that I tried - some tighter, some wider. I like this because I was able to get the shoreline to work as a leading line to the bridge and then around to the fountain. I was hoping there would be some traffic on the bridge - bicycles with lights or pedestrians with flashlights, anything to give a little brightness. I am going to try getting back one night with some helpers and have them shine some lights or maybe pop a flash or two to illuminate the bridge.

So, that's it for today and my Spring Lake sunset experience. Have you shot here? If so, how did you like it? If not, I hope I have inspired you to check it out one night. Who knows, maybe we will run into each other.


All photos are copyright Joseph S. Valencia All Rights Reserved They may not be used in any way without express written permission of the photographer. If you wish to use any of the photos you may contact the photographer at valencia32photo@gmail.com

Monday, August 6, 2018

Still-Life Macro Photography with the Vello Macrofier

Macro Photography

I love shooting macro but don't get around to doing much - especially "true" macro. What I mean by "true" macro is that most people believe the final image must be "life-size" (1:1) or better. A true macro lens can be quite expensive and most "macro" zoom lenses might get you in the area of 1:4 - nice but not true macro.

I've never owned a macro lens but back in my 35mm days I would use a technique that gave me life-size and better; I would remove the lens, turn it around and hold it against the camera body. When shooting with the lens reversed, you would achieve different levels of magnification depending upon the focal length of the lens. Doing this mean that you lost all camera-to-lens communication and were shooting totally manual and your focusing was essentially achieved by moving back and forth until you achieved focus.

A couple weeks ago I received a lens accessory from Vello called the "Macrofier". It allows me to reverse-mount my lens AND maintain full auto-exposure and auto-focus. It can also be used as a set of auto extension tubes. I played around with it right after it arrived and had some fun but over the weekend I decided to do some more serious work. I set up my tabletop studio - light cube and lights - and spent a couple hours shooting some coins and a golf ball. These images were made to support an upcoming YouTube product review I am working on - I will announce it when published.

I'm not going to get into much detail here, I just wanted to present some of the images I made. I am going to write a full product review here on the blog in the coming weeks and will have the YouTube video up some time in the next week or so. The will also be an installment of "Improve Your Photography" in which I will dive into the world of macro photography but for now, just check out the images.

Notice how shallow the depth of field is for the first two images, that is something you will always battle when shooting macro and is one reason I like using a tripod in a controlled environment.

What are your experiences with macro? Do you have a dedicated lens or do you use some other technique? Leave me a comment below - I would love to hear from you.


All photos are copyright Joseph S. Valencia All Rights Reserved They may not be used in any way without express written permission of the photographer. If you wish to use any of the photos you may contact the photographer at valencia32photo@gmail.com

Friday, July 20, 2018

Product Review: Formatt-Hitech Filters (UPDATED - 3 August 2018)

Update

In January 2018 I wrote a post about becoming a Brand Ambassador for Formatt-Hitech filters - I Am a Formatt-Hitech Ambassador! I resigned as a Brand Ambassador in July 2018.

Some background

In July 2017 I contacted Formatt-Hitech to see about getting a filter kit to review on this blog and my YouTube channel. They weren't able to provide me with a kit but did offer to have me as a Brand Ambassador which entitled me to a discount and allowed me to offer discounts to my followers. I purchased my filter set in July 2017 and used the filters, sparingly, over the past year. I am going to write a brief review in the second half of this post. The kit I bought came with .3 to .9 (1 to 3 stop) solid and graduated neutral density filters. I also bought 1.2 (4 stop) solid and graduated filters. The filter holder is aluminum and I bought 2 rings - 67mm and 58mm. The filters I bought are resin filters and not glass, the glass filters are considerably more expensive.

As I mentioned, I didn't use them a lot but was happy with most of my results but when I tried to use the 3-stop solid filter I realized I had a second 2-stop filter. This was the case for both solid and graduated. I wrote to the company and the filters were immediately replaced with the proper 3-stop. Their customer service is quite good and they were very responsive - I don't know if this is because I was an Ambassador but I don't think so. Everyone that I have dealt with at the company has been very helpful and friendly.

The Review

How I Tested

So, I know all about scientific methodology and controls but I don't have that kind of time. I wanted to put the filters thru their paces in somewhat "real world" conditions, with my main concern being "color cast". Neutral Density filters should be just that - neutral. I wasn't overly concerned with how accurate the "density" was - I wasn't measuring to see if the 1-stop was, indeed, a full stop.

I wanted to keep the number of variables to a minimum so I picked a cloudless, windless day and shot under full sun at noon. I taped a white card with the density of the filter onto a piece of white foamcore. The camera was mounted on a tripod and all exposures were at f/16, ISO 100 and "auto" white balance. The only thing that changed from exposure to exposure was the shutter speed. The camera was a Canon EOS Rebel T3i with a Canon EF-S 18-135mm lens @ 95mm. I set to "manual focus" and turned off image stabilization - the image quality was "RAW+L" - I wanted to shoot both RAW and JPEG. The images shown here are the JPEG images and are all "out of the camera" with no post-processing whatsoever.

The Test

The idea was to test each filter separately (solid and graduated) and then "stack" them to achieve greater densities. The filter holder has three (3) slots, so that was the maximum number of filters for any given exposure.

I started with the 1.2 and worked down to the .3, each a single shot with a single filter. Next, leaving the .3 in the holder, I paired it with each of the other filters - .6, .9 & 1.2. The next step was to test combinations with the .6 and I tested it with the .9 & 1.2, finishing up the initial round of tests with the .9 & 1.2.

After running through all of the combinations with the solid filters, it was time to try the soft graduated - I did each separately and then paired them with the corresponding solid filter, ie .9 soft grad with .9 solid. I didn't bother to run thru all of the combinations.

The last test I did involved only the .9 filter - I wanted to see if there was a "right way" to put it in the filter. I put it in with the engraving facing the lens and then facing away from the lens - there was no difference in the resulting image.

The Results

The results were a mixed bag - some of the filters were truly "neutral" while others were not. The .9 (3-stop) solid filter was the least neutral of them all, in fact, it really wasn't "neutral" at all - there was a distinct magenta cast to the image. This was more pronounced when stacking filters with the .9. This was true of the .9 soft grad, too.

The Bottom Line

If you are looking to open up your lens by 1 or 2 stops to get shallower depth of field, you can get by with these filters. The same can be said if you need to tame a sunset (sunrise) sky a bit - 1 or 2 stop soft grad should do well for you. If, however, you want to be able to use the filters for long exposures or need to open up the lens by more than a couple stops - my recommendation is that you look elsewhere.

Epilogue

I contacted Formatt-Hitech about my findings and gave them access to the JPEGs - this is when I was told the resin filters are not suited for stacking or exposures greater than one or two seconds. I have done some longer exposures in the past - 15 to 20 seconds - in lower light situations and didn't notice a strong color shift when using a single filter but did notice some when stacking. The factory did offer to put my filters thru tests to determine if they were faulty but the packaging and shipping was to be at my expense. The factory is located in Wales. It seemed a fool's folly after learning about the limitations of the filters; from what I had learned thru our emails, even a 100% flawless filter in this series was not going to produce the desired results.

The company does produce a line of glass filters called "Firecrest" - they are quite expensive. I don't know anything about this line, other than what is written on their website but would suggest you look into this line if you are interested in Formatt-Hitech and long exposure photography.

As I mentioned earlier, this was an informal test to see how the filters perform in real life. Your results may be radically different than mine and I cannot vouch for how the filters perform under different lighting conditions. I also based my opinions on the "out of the camera" JPEG images. I decided to bring some of the images into Photoshop and use "Auto Tone" to see how the images would look - most of them were acceptable after applying "Auto Tone" but any combination of filters that included the .9 soft grad still had a distinct color cast on the area covered by the graduated ND. I took five of the test images, brought them into Photoshop, made a duplicate layer, applied "Auto Tone" to one layer and left the other "as-is". Using a layer mask, I created a side-by-side composite - the left side of the image is the edited side while the right is "out of camera". You decide which is more suited for you. I tried using "Auto Tone" on the RAW file using Adobe Camera RAW - the results were not as pleasing and would have required much more work to get a pleasing effect.

When I finished writing this review, I sent a copy to the company asking them for input. I wanted to make certain that I properly represented what they had told me. I have included their feedback below.

from Formatt-Hitech

The following is an excerpt from an email I received after sending them my review:
I have attached a screenshot from our website below, you can reach this page yourself using the following link: https://www.formatt-hitechusa.com/neutral-density

This section of the Learn area of our website deals specifically with ND’s and their relative uses.

Under Popular Uses we state that;

4-6 stop ND filters create a moderate lengthening of exposure time to create a misty effect in moving water. Usually around 1 second.

(Unless I have missed it, you have not included in your blog or any earlier emails how long an exposure you were attempting, but as I said in my earlier email, anything up to 2 seconds should be ok, anything over that will give a colour cast). (Authors note – as stated above, the exposure ranged from ¼ to 1/500 sec, well within the 2 seconds mentioned here.)

The second thing to notice from this section is, under Choosing a ND;

Standard ND are professional quality resin ND filters available between 1-4 stops of ND. Standard NDs don’t block infrared, but they only go up to 4 stops of density, so infrared is not an issue because there is not enough filter factor to overwhelm the digital sensor. With standard NDs, you get a professional quality ND at a really low price.

So we do make it quite clear that the resin filters do not block infrared. This would make them unsuitable for long exposure work. (Authors note – while it does, indeed, state that it doesn’t block “infrared”, I had no idea up until now what that meant. I also don’t know the relationship between that and exposure length. It does state that a 4-6 stop ND will give you an exposure “usually around 1 second.” But doesn’t warn against longer exposures.)

With that being the case, as the results of your blog are that you are experiencing a “distinct colour cast”, I would appreciate if you could refer to this section of our website (maybe include the link) and advise what length exposures you were trying. With anything over 1 second being beyond the bounds of the recommended use. (Authors note – as stated above, the exposure ranged from ¼ to 1/500 sec, well within the 1 second mentioned in this paragraph.)

UPDATE - 3 August 2018

Formatt-Hitech offered to test the .9 ND filters - both solid and graduated - to see if they may be defective. I was going to send them back but there was some initial confusion and then I decided to sell the set so I decided not to return them for testing. If you are interested in purchasing the filters, leave a message in the comments below with contact information or send me an email at valencia32photo@gmail.com and use the subject line "Formatt-Hitech filters". I can also give you the contact information for the people I was dealing with and you may be able to get the filters tested and replaced, if faulty.

See for yourself

If you are interested in seeing ALL of the images, you may check them out at this location - https://drive.google.com/file/d/1jI4YgWncegz-JQ9sW_lbLtxV4fdNOdDR/view?usp=sharing. I don't know how long I will make them available - if this link doesn't work, let me know and I can reactivate it. I can also make the RAW files accessible, upon request.

Monday, July 2, 2018

Maclearie Park - Small Park, Big Sunsets

Maclearie Park

Maclearie Park is a small municipal park in Belmar, New Jersey. On one side you have a highway and the other side is the Shark River which leads into the Atlantic Ocean. Just east of the park is a marina where many charter boats dock; the marina is another great spot for sunsets but that is a story for another day. You may have already seen some of my images from Maclearie Park, if not check out Sunset and a Peek-a-Boo Moon where I not only got a sunset but the added bonus of a full moon peeking thru the clouds.

My Introduction

I have to admit that I never thought about shooting sunsets at Maclearie Park - I had been there with my kids before and have driven by countless times but, for some reason it never got on my list of places to shoot. It wasn't until Dave Schofield (you remember Dave, he was the subject of one of my most popular interviews - Interview with Sports Photographer Dave Schofield. Read it if you haven't already.) Dave shoots there frequently, as well as the marina, and has set the bar high. It has since become a "go to" spot for sunsets and I am often surprised to find new compositions after I thought I had exhausted possibilities. That is one of the wonderful, and frustrating, things about landscape photography - you never know what awaits you.

Trees

I think one of the things that makes the park such a special place to shoot are the trees - especially in silhouette. I have a favorite little tree at the far west corner of the park by a bench. This is the tree in the panorama at the top of the page and the shot with the great cloud formations on the right ("My" tree). I found this tree the very first time I went to shoot but I have since found others that I can use, depending on the conditions. It is easy to get caught up in the beauty of the sunset and focus on the colors but adding some foreground interest will really set your images apart from the rest. You can also use the trees to block out uninteresting stuff - the image above left (Sunset framed by a tree) is one that I found on my last excursion. The sky has some incredible cloud formations but there was also a large expanse of flat, gray clouds between the horizon and the interesting formations. I used this tree to hide the ugly clouds.

Look Away From the Sun

If you concentrate on the sun, you may miss out on some of the best light. The marina sits to the north of where the sun was setting, the image here was shot just a few minutes before the sun disappeared completely. I noticed the lights on the other side of the river and put on a longer lens and stopped down to f/22, knowing I would be able to turn the lights into starbursts. I also wanted the longer exposure so that I could smooth out the water as much as possible. This is one of the few "HDR" shots that I have done - I wanted a darker exposure to capture the warmth of the sky and water but I also wanted some detail in the building and shadows. This image has proven to be quite popular.

My last image for today is an example of a making lemonade when the world gives you lemons. I was at the park for what I thought would be a nice sunset but it wasn't very good. I started looking around and saw this tree with the pastel sky behind it. I was shooting towards the east, away from the setting sun and was initially struck by the muted colors.

In Closing

I hope I have inspired you to get out and shoot a sunset or two, maybe even at Maclearie Park! If you do go to Maclearie Park, I have a few suggestions:

  1. Get there early! This is especially true if it is your first time there. You want to scout the park and look for your composition. I have been there in each of the different seasons and a composition that works in the winter, may not be there in summer. It is also a popular place for people to watch the sunset so you want to stake out your territory.
  2. Bring insect repellent! Obviously, this doesn't apply year-round but definitely during spring and summer. The gnats and mosquitoes can be quite a nuisance and you will spend more time shooing them than shooting. I have been using "Deep Woods Off!" the last couple times I was there and it made a big difference.
These are just a handful of the many images I have of sunset in the park and just a fraction of the compositions available to the photographer willing to look. Have you been to Maclearie Park? If so, let me know what you think. What is YOUR favorite place for sunsets or sunrises? I am also looking for new places to shoot. So, if you find yourself in the Belmar area, looking for something to do - check out a sunset at Maclearie Park, you won't be disappointed. While you're there - if you see me, stop by and say "Hello!", I'll be the guy with the tripod and backpack.

Until next time - get out and enjoy the beauty that is nature!


All photos are copyright Joseph S. Valencia All Rights Reserved They may not be used in any way without express written permission of the photographer. If you wish to use any of the photos you may contact the photographer at valencia32photo@gmail.com

Tuesday, June 5, 2018

Improve Your Photography: Event Photography, Part I - An Introduction

If you think about it, just about anyone who has picked up a camera has done event photography. The event might be a baby's first birthday or a special Mother's Day brunch. They are small, personal events but they are events nonetheless. I have done some work as an event photographer over the years and find the work to be quite exhausting and very satisfying. I have done everything from a surprise birthday party to the National Frisbee Festival in Washington, D.C. and the New Jersey Folk Festival. Weddings and sporting events could be included in this article but I think they are such big topics they should get their own treatment. I also believe that the objective of weddings and sporting events are different. Those events are all about the subject - the bride, the groom, guests, the star player, the winning goal, etc.... When I think of "event" photography the result should be greater than a sum of the photos - you should be telling a story. Wait! Isn't that photojournalism? Yes but not necessarily. The following snippet from Wikipedia explains (read the entire article here):
Photojournalism is distinguished from other close branches of photography (e.g., documentary photography, social documentary photography, street photography or celebrity photography) by complying with a rigid ethical framework which demands that the work is both honest and impartial whilst telling the story in strictly journalistic terms. Photojournalists create pictures that contribute to the news media.

So, you see, while event photography and photojournalism can be thought of as being essentially the same thing they are not. The event photographer can use his photos to tell whatever story he wants and shoot however he wants. He can also manipulate the images and subjects - ask them to pose, perform a certain action, etc.... He is not constrained by journalistic integrity or rules.

While working as the official photographer for the New Jersey Folk Festival back in the mid-80's I struck up a conversation with a photographer covering the event for a local newspaper. During that conversation he gave me the best advice ever - the shots that sell are children, pets, women and veterans/active military. He told me that if I shot with that in mind I would do well. Those words run through my head every time I shoot at an event. If you take away nothing else from this post, remember those four (4) things and you will do well.

Preparation

The first thing you need to do in advance of the event is to make a plan. Research as much as you can ahead of time so that you know what to expect and determine what the important shots are. Some questions to ask yourself are:
  • who are the event VIPs?
  • what are the most important aspects of this event?
  • what will the photos be used for?
  • where is the event being held? indoors? outdoors? both? large area? small area?
  • when is the event - daytime? nighttime? both? season?
  • why is this event being held?
  • why do people come to this event?
If the event is a charity event try to learn about the charity before the shoot and make certain to pay attention to the volunteers, they are as important as the participants. If you are covering a local festival you want to know what the theme is, who are the organizers, are there featured performers and what are the most popular events? If it is a political rally you might want to consider if the politician is controversial and what protests might take place. A company picnic has quite a bit going on and photos of the executives are important, try to get them interacting with the employees. If you can get the CEO with a face covered in pie during the pie-eating contest you have yourself a winner! Remember the four keys to a successful shoot? If the CEO is staring face-to-face with a 3 year-old covered in pie, you have the perfect shot.

The more prepared you are before you take the camera out of your bag, the easier and more successful the shoot will be. If possible, meet with the organizers prior to the event and create a shot list. This list isn't written in stone and is only a guide but it will give you an idea of what is important to the organizers. If there are photos that must be taken, make note of them and make certain they are taken. You may find that the list is limited to "you're the expert, we will leave it up to you." That's great! Right? No, not even close. While this may yield satisfactory results 99% of the time you will inevitably miss a crucial shot at some time. Imagine if you are shooting a wedding and the bride says "I want you to shoot the standard list of photos that all brides want." You do exactly what she asks and then even more but you didn't get a shot of the bride with her third-cousin-once-removed from Boise who drove for two days to get to the wedding. You just lost a happy customer. In this case, a simple "Do you have a list of guests that you want me to make sure to photograph?" would have made all the difference. So, ask questions keeping in mind the above list of who, what, where, when and why.

I think this is a good place to stop. I have given you quite a bit to think about and hopefully laid a good foundation for you. If you follow some of these simple guidelines you will notice your event photography will be vastly improved and easier on you! The next part of this series will cover "Charity Fundraising Walks".

Friday, June 1, 2018

Product Photography - a new venture

Product Photography

I have decided to try my hand at product photography and have found that it can be both frustrating and fun. It is also something that can be done virtually anywhere, any time with very little equipment. I got into it almost by accident, really. I had done some self-portraits in the woods - some of which showed me hiking with my Tamrac camera backpack. I saw some ads on Instagram that were similar and thought, "Hey! Why not?" I then set out to try to get some work shooting products for social media. It turns out, Tamrac used one of my self-portraits in their Instagram feed, with my permission, of course! (You can see it here - https://www.instagram.com/p/BhwxRV7FMxD/?taken-by=tamracphoto)

Swiss Army knife

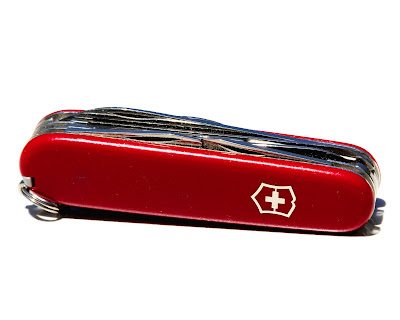
The first image of the Swiss Army knife was shot, handheld, with the knife resting on the hood of my car. The car is white with metallic flakes and this was shot a little after noon on a cloudless day. There was a little bit of editing but it is pretty much out of the camera. I then took the knife over to a post and took the next image. This, too, was handheld and had minimal post-processing. I used white foamcore to bounce a little light into the shadow and remove some of the distracting reflections - if you look closely, you can see it on the blade. Most of the post-processing involved the background - I decided to darken and de-saturate the background so that it wasn't competing with the knife. I have used this technique a few times, as you will see in some of the other images in this post. I like the effect, what do you think?

Leatherman

This was my first "paid" job, I received the multi-tool (Juice® CS4) directly from Leatherman in exchange for a negotiated number of images for them to use in their social media campaigns. I had a lot of fun with the Leatherman shoot and learned even more in the process. The original idea was to shoot it in a light tent, which I did, but I was looking out my backdoor and saw a tree limb had fallen. This is when I got the idea of shooting outside, too. I found this log, stripped of it's bark, laying just beyond my fence - I grabbed it and used it as the surface to lay the tool. I used some white foamcore to bounce a little light into the shadow and keep the camera from being reflected in the metal surfaces. I like this one but next time I think I need to get a little more light in the shadow - they might be just a little too dark. What do you think?

I set out to create "catalog" shots and maybe one image of the tool "in-use" but in the end didn't do the "in-use". I had just received a table-top studio outfit from a friend - a 20" cube tent, two lights, a tabletop tripod and some backgrounds - so I set that up in my kitchen and spent the afternoon. The second image was done in the tent with lights at 90° and a white foamcore between the camera and the tent. I used the black "seamless" background that came with the studio fully intending to have the black just disappear. As much as I tried, I couldn't get the background smooth and so I decided to use the irregular background almost like "leading lines" by having the light lead to the products. This may have been a happy accident that lead to a more powerful image. It also helped to show off the black leather case a little better.


Ledlenser

When I was arranging the deal with Leatherman I learned that they were somehow affiliated and I could also work with them under the same deal. I received this MH30 rechargeable headlamp. I had been wanting a headlamp for a long time and this one was perfect for me. The first image was shot in the light tent with the black cloth background but I kept the background to a minimum by getting in tight on the product. Working with the headlamp proved to be a bit more challenging than the multi-tool, in part because of the elastic headband. It was very difficult to get everything to stay where I wanted it and to position everything exactly as I envisioned. The second shot was taken outside with the headlamp and case sitting on the hood of my car, just like I did for the first Swiss Army knife shot. I didn't use any light modifiers or reflectors for this shot - it was strictly available light. The car, itself, was acting like a large reflector.


In closing

I am going to leave you with one of the images that set me down the product photography trail, one of the self-portraits I shot wearing the Tamrac backpack. This is not the same image Tamrac used in their Instagram feed but it was shot during the same session. While writing this post I decided to do a follow-up showing my "in-use" images featuring the Tamrac backpack and some other products I have done along the way. I like the "in-use" shots but they present a special challenge all their own and I will get into that in the next post.

Until next time - be kind to Mother Earth and get outdoors! As always, I welcome your comments and feedback below.


If you are a company looking for a product photographer, I would love to talk to you about your photography needs. Send an email to valencia32studio@gmail.com.


All photos are copyright Joseph S. Valencia All Rights Reserved They may not be used in any way without express written permission of the photographer. If you wish to use any of the photos you may contact the photographer at valencia32photo@gmail.com

Monday, May 7, 2018

May is National Photography Month (2018 Edition)

National Photography Month

Yes, among many other things, May is National Photography Month. This is not to be confused with World Photography Day which, in 2018, is 19 August. May is also National Mental Health Awareness Month, National Bladder Cancer Awareness Month, etc.... I have written about mental health and bladder cancer on my other blog - see Out of the Darkness - Suicide Prevention and Mental Health and Did you know - May is Bladder Cancer Awareness Month?.

Let's celebrate!

Do you celebrate National Photography Month? If so, how? In the past I have celebrated in different ways - in a previous blog that I wrote I posted a photo or collection of photos every day during the month. That started out sounding like a great idea but ended up being a bit exhausting. In 2017, the first year of this blog, I wrote nine (9) articles covering a variety of topics - including "National Photography Month", an article that included several images and a little background on each. This year I am taking somewhat of a different approach.

My celebration

This year I decided to focus less on photography and more on using my photography to help others. I am doing that by volunteering my time to act as an Event Photographer for fundraising / awareness walks for two deserving organizations - both of which are new to me this year. This past weekend I covered the "Jersey Shore Walk to End Bladder Cancer" in Bradley Beach, New Jersey. I learned that May is, among other things, National Bladder Cancer Awareness Month, and the Jersey Shore walk has been held every year since 2011. I had not heard of it until last year when I heard Bill Doyle, the afternoon drive-time co-host on NJ 101.5 FM, talk about it. He was coming back after a long battle with the disease and talked about participating in the walk. To be honest, I had a lot going on last May and when he stopped talking about it, I stopped thinking about it. This year I decided to do something about it and contacted the organizer, Mary Ann Aregood. Mary Ann's husband, Jack, succumb to the disease in 2008 and she started the walk in 2011 in his honor. I wrote about the walk and my experience on my other blog, From the Mind of Joe Valencia. You can read that post here - Did you know - May is Bladder Cancer Awareness Month?.

The other event I am covering in May is the 7th Annual Mary's Place by the Sea Walk-A-Thon to be held on May 19th in Ocean Grove. I have been aware of Mary's Place by the Sea for quite some time and knew they had an annual fundraising walk but the timing was never right for me to volunteer. This year all of the stars aligned and I will get my chance. They are a nonprofit organization whose mission is to support women who are receiving treatment for cancer. Since their inception in 2009, they have helped more than 8,000 women and help more each day. I am looking forward to this event but, like all things I cover for the first time, it has me a bit nervous. I'm always excited about a new event until my participation is finalized and then I think "What have I done?" It isn't that I regret volunteering, it is all about the unknown. I don't know how many people to expect, how long the event lasts, how receptive people are to my photographing them, etc.... The uneasiness (apprehension) melts away about 5 minutes after I get started and I have never had an issue in the more than 10 years I have been volunteering. I will write more about Mary's Place and the walk in a few weeks. Stay tuned.

So, that's it for now. This post is a bit different than what you might otherwise expect to find here but I want to bring attention to these important organizations and events. If you are interested in participating, volunteering, or just want more information - check out the links below. Thanks for stopping by. As always, I would love to hear your stories and comments - please leave comments below.

Bladder Cancer Advocacy Network (BCAN) - http://www.bcan.org
Mary's Place by the Sea - https://www.marysplacebythesea.org/

Saturday, April 21, 2018

Copyright: Should You Ever Give It Away?

NO!

Wow! That is the shortest blog post I ever wrote! I know I am being a bit flippant but seriously - do not give away your copyright.

You may be asking, "Why would you even suggest the possibility?" Good question. If you are a regular reader of my "general interest" blog - From the Mind of Joe Valencia - you will know that I enjoy working as a volunteer photographer for a variety of organizations. This year I am booked for four (4) events for four (4) different organizations. In the past I have worked for others and there are some I would like to have worked for but, when I read their agreement, decided I could not. One such case happened to me just this week. Those are the organizations that prompted me to write this post.

I am not going to "name names" because they may, at some point, change their policies and that isn't the point of this post. The point is - do not give up the rights to your images without sufficient compensation. This particular organization considers this to be a "work for hire" situation, however, I don't think that would hold up if it were contested. Disclaimer: I am NOT a lawyer and have no formal legal training - the following is an OPINION based upon research I have done. A "contract" must provide benefit for all parties signing it. You do something for them, in return you get something from them. In the case of surrendering your copyright while getting nothing in return does not satisfy that equation. The paragraph below is extracted from a "Service Agreement" I was recently asked to sign.

Property of ABC_XYZ CORP. All drawings, models, designs, formulas, methods, documents, creative works (including photographs, audio-visual and other multi-media materials), tangible and intangible items and work product (collectively, the “Work Product”) prepared for and/or submitted to ABC_XYZ CORP by Vendor in connection with the Services shall belong exclusively to ABC_XYZ CORP and shall be deemed to be works made for hire. Any Work Product or deliverable of the Services is the property of ABC_XYZ CORP and will not be made available by Vendor to any third party. Promptly upon the expiration or termination of the Terms, or upon the request of ABC_XYZ CORP at any time, Vendor shall deliver to ABC_XYZ CORP, in a form specified by ABC_XYZ CORP, all Work Product, documents and tangible items, including samples, provided to Vendor or created by Vendor for use in connection with Services, including, without limitation, all Confidential Information, together with all copies and abstracts thereof.
As you can see, they get all of your work - free of charge - and in return you get a pat on the back. I rejected this agreement and asked them to reconsider - their counter was that I "can post an image they took on social as long as they say it was for ABC_XYZ CORP and we own the rights." Hardly an equitable solution. I was even told by the person I spoke with that I could "show up and shoot, unbeknownst to the organization and then 'gift' all of the images to them." Strictly "unofficially", of course. So, I could help them except no one was allowed to know. Yea. Right! I still wanted to make this work so I offered to sign over all rights, including the ability to use on my social media, in exchange for $1,500.00 per event. This is a reasonable amount considering I was going to be working the event for 6 or more hours, plus the time editing - not to mention giving up my rights. They refused and so I have two weekends available to do other work. Now, before you accuse me of being unreasonable and taking away valuable funds from the program, consider this - according to Charity Navigator, the President/CEO received compensation of nearly $500,000 in 2015 and the Executive Vice President/COO received compensation of more then $2.7 million!

So, in closing, should you give up your copyright? That is something you have to decide but I would caution against it. You've worked very hard to get to where you are in your photographic journey and you need to demand the respect for your work that it deserves. You don't want to allow others to put their name on your work, especially if they don't pay you for it. I don't know how many photographers agree to these terms, maybe I'm the only one, but I cannot imagine there are many.

What do you think? Would you sign the agreement and forfeit your copyright? Would you do it for money? How much? I would love to hear your comments and stories - please post in the comments below.

Until next time - get out and shoot!

Monday, March 5, 2018

Sunset and a Peek-a-Boo Moon

Sunset

After a particularly rough day at the office I decided to shoot a sunset on the way home. The conditions were okay but I knew I wasn't going to get an incredibly spectacular sky. This shoot wasn't necessarily about getting a great image but rather unwinding and getting rid of a bad day.

When I got to MacLearie Park in Belmar I had about 30 minutes or so until sunset so I took my time finding a composition. I have shot here before but always at the westernmost point so that I can get a sailboat and small tree in the shot. I wanted something different this time so I walked along the water towards the east until I found the tree that is in the first image. I now had a subject but that is a long way from having a composition that I was happy with. I finally settled on the somewhat wide, landscape shot and waited for some color on the horizon.

While waiting, I took out my phone and wandered around - I turned towards the west and got this image of the sky. You can see the edges of the clouds just beginning to get some red and magenta along the edges. I shot this with the camera in Lightroom for Mobile, did some on-location editing and used this as my "I am here, where are you?" social media shot for the night.
I was happy with the first composition but wanted to see if I could isolate the tree a little more so I moved a bit to my left, went from wide angle to a moderate telephoto focal length and shot. I cropped it to a square in post-production and really like the way it came out. This is definitely a tree that is going to get more exposure in the coming weeks and months.

Peek-a-Boo Moon

Don’t pack up your camera until you’ve left the location. – Joe McNally
When the sun was down and I had gotten what I came for I picked up the tripod and headed back to the car. It was a chilly evening but nice so I took the long way. I had not gone far when I decided to take a look at "my" tree from the opposite side - maybe it would be a nice subject for a sunrise one of these days. I turned around and was confronted by the scene shown in the last image. The moon was peaking thru the cloud, I had the lights of the marina and bridge in the distance. I quickly set down the tripod, composed the image and grabbed a few shots before the cloud ate the moon for good.

The quote above is one that I found a while ago and I pull it out every once in a while. I used to pack up my gear when I was done shooting and then head back to my car - it was easier to carry and I could just get in the car and leave. I did this even after I saw this quote! I don't do it any more.... I had an instance where I packed up and an unbelievable composition with near perfect light jumped out at me - I grabbed by bag, set up the camera, pointed it and then muttered a few words that I won't use in polite company. The moment was gone.... I have not packed up before reaching the car ever since.


All photos are copyright Joseph S. Valencia All Rights Reserved They may not be used in any way without express written permission of the photographer. If you wish to use any of the photos you may contact the photographer at valencia32photo@gmail.com

Featured Post

Macro (and Close-Up) Photography - A Whole New World

Macro (and Close-Up) Photography - A Whole New World All photos are copyright Joseph S. Valencia, All Rights Rese...