Saturday, February 23, 2019

A Foggy Winter Morning

Ah, Fog

I love a good, foggy morning. Don't you? I don't particularly like driving thru "pea soup" but when it comes to photography, few weather conditions can get me as excited as a good fog. We got a good deal of snow on Wednesday afternoon (about 2 1/2 inches) and then it turned to rain in the early evening; by morning it was an ugly slush more than anything. The conditions were perfect for fog and I knew exactly where I wanted to shoot, I just had to hope it didn't dissipate before I got there.

I headed straight for Durand Park in Freehold, a place I have been to many times before, in all types of weather. I have even shot there in the fog a time or two. I would normally head straight to the lake but this time I had a completely different part of the park in mind. The last time I was there I walked along a trail that runs more or less parallel to the road. This part of the park has quite a few small to medium sized trees of all types. I saw one in particular that I noted would make a good composition when the conditions were right - this was the time. The trail was slushy and my feet got wet soon after I started out - it isn't the first time I got wet feet and it won't be the last - but I was on a mission. I actually found a few other trees that looked good with the fog as a backdrop, some of which are shown here.

I walked around for about 30 minutes, looking at different trees from different angles and found that low-angle shots worked the best. I wasn't about to get down on my belly in the slush and I had left my tripod in the car (don't ask me why, I have no idea) so I flipped open the screen, turned it up and held the camera close to the ground. One of the features of the Canon Rebel EOS T3i is the flip-out Vari-angle 3.0-inch Clear View LCD monitor which allows me to hold the camera low (or high) and still see the composition.

After I walked around for a while and looked at every tree I decided to stop by the lake to see if the fog was giving anything interesting there. Sadly, by the time I got to the lake much of the fog had dissipated and there was nothing to see. I headed back to the car, got all of the slush and mud off of my shoes and headed to the office. I knew I had at least one or two solid images and couldn't wait until I was able to process them.

I did a preliminary edit of the smartphone image on my phone using Photoshop Express but knew it wasn't quite "there" yet. I uploaded to Photoshop and got it to where you see it now. This is the only smartphone image of the morning - the other three (3) shown here were made with the Canon EOS Rebel T3i and my Canon EF-S 18-135mm lens. The RAW images were edited in Lightroom and finished in Photoshop.

I am happy with these images but they have me craving for another foggy morning. While editing these (and some of the other images that didn't make the cut) I played with some compositions that I want to try. I also want to get there when the trees have leaves and at peak foliage. I found some interesting trees and other features in this section of the park that deserve some attention in the future. You wouldn't think there were a lot of opportunities in such a small area but you would be wrong.

I hope you enjoyed these images as much as I enjoyed making them and bringing them to you. I would love to hear your thoughts in the comments below and tell me about your experiences shooting in fog. Until next time!


All photos are copyright Joseph S. Valencia All Rights Reserved They may not be used in any way without express written permission of the photographer. If you wish to use any of the photos you may contact the photographer at valencia32photo@gmail.com

Tuesday, February 19, 2019

DAMN, IT'S COLD! It's Time To Hit The Beach For A Sunrise!

Sunrise - Spring Lake, New Jersey

Disclaimer: I mention a local hotel and some equipment in the following blog post. This post is not endorsed by them in any way nor am I being paid for writing this or mentioning them. If you purchase something, I receive absolutely nothing.
My wife and I went away for a long weekend with our good friends, Danny & Debbie. We stayed at the Hewitt Wellington Hotel in Spring Lake. I had photographed the hotel one night - I was there to photograph St. Catharine and the park across the street but after the sun went down I was drawn to the hotel reflecting in the lake. You can view that image on my Instagram feed in black & white and in color. I posted a couple of the images on Facebook and a friend commented on how nice the hotel was. When we were looking for a place to stay for the weekend, I suggested we check it out. It is quite nice and I would recommend it to anyone looking to stay in the Spring Lake area. The hotel was booked solid for the weekend - in February! - so I would think it might be wise to book well in advance if you plan to stay when the weather is nice. The hotel is about two (2) blocks from the beach so I planned to catch the sunrise on Sunday, if I was awake. I knew it was going to be cold and the weather forecast was "iffy" so I wasn't going to set an alarm and wake up my wife. As luck would have it, I barely slept all night and at 6:00 decided to get dressed and walk to the beach. The Weather Channel said it was 27°F with 18°F windchill but they weren't at the beach! I swear the windchill was more like 0°F standing at the edge of the ocean.

I no longer own a pair of gloves, I lost mine (driving gloves) a couple years ago while out on a hike and just never bought another pair. The winters in New Jersey have been somewhat mild with occasional "arctic blasts" so I haven't been able to justify spending $70 or more for a good pair of photographer's gloves. This sunrise excursion had me questioning my decision.... Fortunately I have a Canon cable release for my camera (a Canon Rebel EOS T3i) and I was able to keep my hands in my jacket pocket much of the time; even with this, my hands were bright red and barely functional when I was putting my gear away after about an hour. I think I might break down and buy a pair of Vallerret photography gloves next fall and a good balaclava to keep my head and neck warm. If you own Vallerret gloves - how do you like them? Are they really as good as they say they are? If you have other gloves, which ones and would you recommend them? I am also open to recommendations for a balaclava - I've never owned one.

Now on to the sunrise! The official sunrise time was 6:45 and I arrived at the beach just before 6:15, plenty of time to find a composition and set up. I had the added advantage of having been to this exact spot on the beach a week or two earlier so I had a composition in mind before I got there. I wanted to use the jetty as a mid-ground and the scattered rocks on the beach as foreground. The tide was coming in and much higher than the last time I was there - the foreground rocks were almost entirely swallowed up by the incoming waves. You can see the clouds in the first image - those were the only clouds in the sky that morning and they never moved. Well.... later that morning the clouds rolled in - plenty of high, wispy clouds with a nice mix of low, puffy clouds. Had they come a few hours earlier the story would have been a whole lot different. I guess if the conditions were always the way you wanted them to be, landscape photography would get pretty boring - huh? 😉

I set up the tripod about as close to the water as I dared and fired off a couple test shots. I wanted to get a fairly long exposure to help smooth out the water and stopping down to f/11 gave me a 10 second exposure for the first image. I would like to have gone with a 25 or 30 second exposure but didn't want to stop down any more than f/11 or f/13 and the thought of fooling around with ND filters in the cold was not appealing to me. If the conditions were better, sure, but not this day. Overall I'm happy with the first image but I may have been able to add a stop or so to the exposure and open up the shadows a little more; maybe even a little "light painting" with my headlamp or flashlight.

As I was waiting for the sun to rise, I turned the camera south and made an image of the beach before turning the camera to the north and doing the same. The second image shown here is the north-pointing image. I stopped down to f/13 to get a 30 second exposure. When I checked this shot on the back of the camera I was quite happy with this image - the lamps on the boardwalk gave me a nice star and the water looked nice; it wasn't until I got home on Monday and started processing it did I notice the Belmar Fishing Pier in the distance. I think it adds a great touch, what do you think?

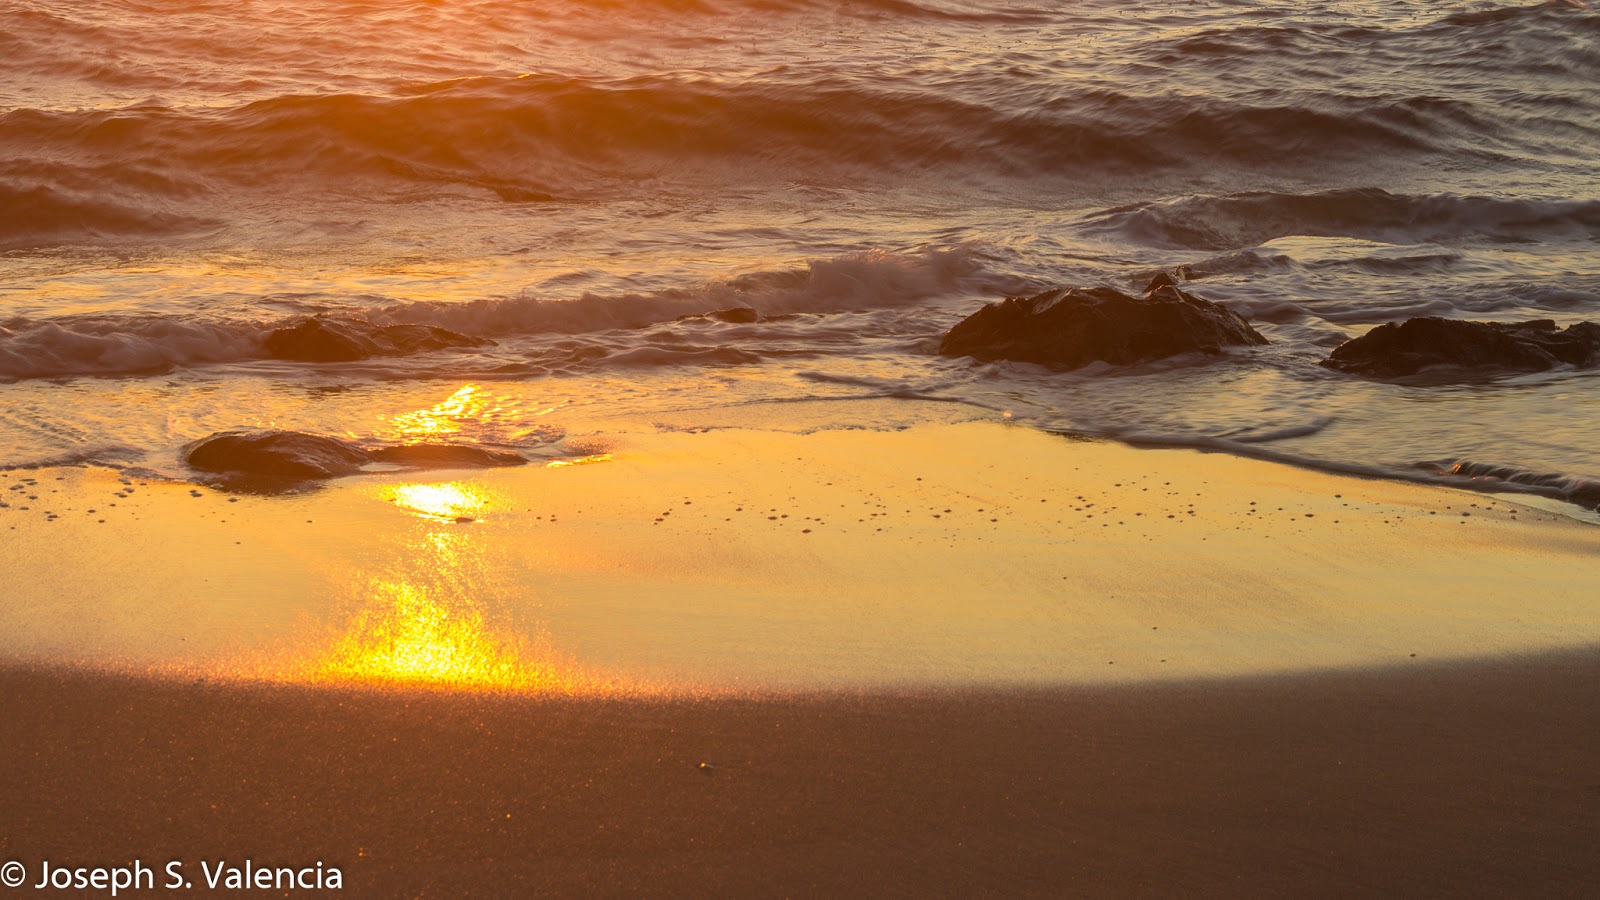
Lastly, once the sun started peeking over the clouds I grabbed a few more of the jetty but the sun was too harsh and I wasn't thrilled. I was about to put the camera away when I looked down and saw the sun starting to creep into the reflection on the wet sand. I liked the way the water was reflecting the sun and color in the sky so I composed the frame and starting shooting. I wanted to make sure I got it right - not too much water but enough. The exposure for the image I settled on was 1/25th @ f/11. It was taken within 8 or 10 minutes of sunrise. Once I thought I had what I needed I headed up to the boardwalk to put my gear away. There is a pavilion to provide at least some relief from the wind. By this time my hands were bright red and I was barely able to work the clips on my backpack to get it open but there was no way I was carrying the camera on the tripod all the way back to the hotel. I got everything put away, put the pack on my back and headed for the hotel and coffee maker! It took about an hour before I was completely warm....

I hope you enjoyed this post and the images. I would love to hear what you think and also hear about your experiences shooting sunrise. What were the most difficult conditions you have had to fight? This past Sunday weren't the worst I have endured but they are in the Top Ten. Until next time - get out and enjoy what Mother Nature has to offer while we still have a chance!


All photos are copyright Joseph S. Valencia All Rights Reserved They may not be used in any way without express written permission of the photographer. If you wish to use any of the photos you may contact the photographer at valencia32photo@gmail.com

Thursday, February 7, 2019

Some of my Favorite Lakes in Monmouth County

A few of my favorite lakes

My wife was looking thru her Facebook feed the other night and came across some pictures that a friend posted. There were some swans on a lake (but it wasn't Swan Lake.... 😂 .) She showed them to me and asked if I knew where the lake was, she seemed to think it was Belmar. I looked and it seemed more like a small lake in Ocean Township - after we guessed a couple times she asked her friend; we were both way off! The lake is in Brick. My wife then asked if I had written any blog posts about lakes; realizing that I had not, I silently vowed to write one.

I don't know why I haven't done this before, I have shot around many lakes - some of which are very special places to me. Looking over my previous 76 posts I realized I haven't written about a single lake, their images have appeared in posts but I've never written about the lake or highlighted it specifically.

Lake Topanemus

Lake Topanemus is located in Lake Topanemus Park in Freehold. I have done a lot of hiking and shooting in this park over the last few years. It used to be my "go to" spot for lunchtime hikes but don't go there as much anymore, seems like there are more people there now. I will go on the occasional hike there on my way to the office in the morning when the deer outnumber the people 15 or 20 to 1. The image here was made a few years ago during one of my lunchtime excursions. This particular image was taken with my smartphone and then edited with Photoshop. If you can get there during peak foliage, do it. This is just one of many foliage images I have of the lake.

In the warmer weather you will find a wide variety of birds using the lake - ducks, geese, egrets and herons are just a few. If you are quiet and pay close attention around the edge of the lake you may get lucky and see turtles sunning themselves on fallen logs in the water. They are even more skittish than the deer so don't try to get too close.

There are many benches along the trail where you can just sit and watch the world go by - many of them have "memorial" plaques on them, dedicating the bench to a friend or loved one. There is one in particular that caught my eye - I wrote about it on my other blog; Mayor of the Park. If you look up in the trees you will also find quite a few decorated bird houses, there are many varieties of birds for bird watching.

Divine Lake

Divine Lake can be found in Divine Park in Spring Lake. I discovered this lake when I went to shoot a sunset at St. Catharine Church. A friend suggested the church as a great subject for a sunset so I set out one night last summer, I like shooting sunrise/sunset when I can include water and Dave suggested I check it out. I knew I was going to come away with some pretty good images if I could decide on a composition. The image shown here was shot from the bank, opposite the church and facing north. You will notice - St. Catharine is nowhere to be seen. The fountain caught my attention, as did the footbridge beyond it. This is a fairly long exposure to get the fluidity of the fountain and to smooth out the lake as much as possible.

The lake is reasonably large and there is a second footbridge behind and to the left of the one in this image. I made a mental note to go back during peak foliage but 2018 was a disappointing year for color around here and I never got there. There's always next year and the year after that and the year after that, etc.... At the north end of the park you will find tennis courts and a playground. There is a sidewalk that runs the full perimeter of the park and is a great place to go for a leisurely walk. I would suggest, however, a good bug spray for the summer months.

Manasquan Reservoir

The Manasquan Reservoir in Howell is quite large and offers unlimited opportunities for a photographer. There are a few trails that provide nice opportunities for hiking and photography, including one that traverses the 5 mile perimeter of the reservoir. The image shown here is a panorama taken along the perimeter trail, standing on one of the footbridges. If I were to turn 180° I would have been looking out over the reservoir and another beautiful view. I always thought this spot would be great to shoot the setting sun but the sun never sets within this frame....

The reservoir offers many activities such as boating, fishing, birding, hiking, bike riding, etc.... or you can stop by the Manasquan Reservoir Environmental Center. The Center provides many free programs that change regularly or you can get a "Safari Backpack" and go on a self-guided adventure. Check out the website to see what is happening (click here) or just stop by. I see something new every time I go.

Turkey Swamp

I don't know the name of the lake, if it even has one, but I sure do love to shoot it. The lake, and park, hold my interest year-round. The panorama shown here was shot late afternoon on a summer's day. I like to look at this image and imagine it is my personal dock on a private lake somewhere in the mountains. How perfect would that be? I don't think I will ever live that scenario so I some to this spot whenever I can and pretend it to be so.

In autumn this lake and the island in the middle (to the left of the dock) come alive with color; particularly beautiful are the aspen trees that dot the shoreline. The white bark stands as a great contract to the vibrant colors - if you are lucky enough to be there on a calm day, the reflections in the lake make for some spectacular images!

Durand Park Lake

There is a small park in Freehold named Durand Park, just off the parking lot is a small lake filled with possibilities. The image here was made on my way to the office one morning. This is a great place to shoot in the snow and I didn't want to waste an opportunity. When I arrived I was a bit disappointed that the lake wasn't completely frozen over but then I realized how lucky I was. While this is a nice image, I think the reflection is the crowning touch. I have edited this image a few different ways - color, black & white and a mild sepia tone - but always like black & white when it comes to snow scenes like this.

This lake was probably the most difficult of all to select a single image for because I have so many that I like. If you are here during peak foliage, the lake comes alive with color. I have been here when there was a low-lying fog over the lake that gave a great atmosphere to the image. There are also aspen trees that are arcing over the lake that make a great subject at varying times of year. The lake also has a lot of lily pads at are quite photogenic all on their own. This is a great little park that doesn't seem to get nearly as much attention as it deserves and, maybe, that's a good thing!

Lily Pad Lake

Lily Pad Lake is the name I gave to a small lake hidden away at Allaire State Park. This is where I go if I absolutely want to be alone as very few people venture this far along the trail. The image here is an older one that I made with my Motorola smartphone a few years ago. The lily pads were not out when this image was made but if you are there at the right time you will see them cover much of the west end (nearest the camera) of the lake. What really attracts me to this lake, other than the seclusion, are all of the dead trees sticking out of the lake surface. You can see, this day was rather calm and the reflections of the trees add another dimension to the image.

There is a single bench on the edge of the lake where I can, and have, sit undisturbed for a long time just watching the birds, waiting for a turtle to pop up or even catch a deer on the far shore. I come to this spot when I have the need for some quiet time to reflect on life's events, decompress from a rough day or even write letters and blog posts.

These are just a small number of beautiful lakes to be found in Monmouth County and around New Jersey. I hope I have inspired you to go out and explore these lakes for yourself or to go out and find your own. If you know a place that isn't here - please comment below and tell me about it. If you have been to one of these lakes, let me know your experiences there - I'm always interested in hearing from you.


All photos are copyright Joseph S. Valencia All Rights Reserved They may not be used in any way without express written permission of the photographer. If you wish to use any of the photos you may contact the photographer at valencia32photo@gmail.com

Monday, February 4, 2019

Product Review: Kelty Redwing 32 Backpack

Kelty Redwing 32 Backpack

If you are a regular reader on this blog you may remember the reviews I did on the Tamrac Hoodoo 20 Camera Daypack (Product Review: Tamrac Hoodoo 20 Camera Daypack and UPDATED: Product Review - Tamrac Hoodoo 20 Camera Daypack) and that, while a nice bag, it did not suit my needs. I soon discovered that most of the camera bags/backpacks were lacking some of the basics - such as water bottle pockets. I did find them on the higher-end bags but they were priced outside my budget. I started looking at hiking backpacks and found the Kelty Redwing series. I decided on the Redwing 32 (pictured here with Kelty Range 2.0 trekking poles) in "twilight blue." For more information and specifications, follow the link to the Kelty website below.

First Impression

When I first opened the box I was quite happy - it is a good-looking bag with a lot of pockets for storage. There are two (2) outside pockets for carrying water which already put it head-and-shoulders above the Tamrac bag. The back is well padded, as are the shoulder straps but I would like to see the waist belt and sternum strap a bit more robust. The bag is well made, has plenty of pockets - inside and out - and the zippers work smoothly. There are "hidden" straps in the front of the bag for hanging miscellaneous items. One thing that is noticeably missing is the presence of "D"-rings on the shoulder straps. They aren't absolutely necessary but it is something I would like to have had, it makes it easier to have some things "at hand" when you need them - like a compass, emergency whistle, etc....

In The Field

I have been using the pack for a few months and love it. When I got the pack, I also got a medium storage box (Kelty) to hold my filters, filter holder and some small accessories. In the beginning, I put a folded sweatshirt in the bottom for padding and then used bubble wrap around my lenses and camera body to protect them. This worked but was rather awkward. I then searched B&H for inserts and found the Ape Case Cubeze QB39 Flexible Storage Cube (see link below.) This was perfect for holding two lenses and camera body.

The pack feels good on my back and allows me to carry everything I need for an afternoon out - including the tripod! There is not a dedicated "tripod holder", after all this pack isn't designed as a camera bag, but I am able to carry is on the side. I slide two legs behind of of the outside pockets and into one of the water bottle pockets. It isn't ideal but it works quite well. There are two (2) loops at the bottom of the pack, they are designed to hold trekking poles, and I think I can use one or both for the tripod. I will have to play around and will let you know in a follow-up if I have any success.

Final Thoughts

All in all, I love the pack. As I mentioned, a couple "D"-rings would be nice and better waist/sternum straps would help but there really isn't anything else I could think to improve on it's design. I do have some trouble getting my water bottles to stay but I am using bottles that it wasn't really designed for. I have Takeya 24oz and 32oz bottles - they fit nicely but they are a bit tall and since they are aluminum they slide out easily. They stay just fine while I am hiking but sometimes fall out when taking the pack off.

There is more than enough room for all of my gear, water, extra clothes and some food - everything I need for a full day of adventure and shooting. The bottom line is - I would highly recommend this bag to hikers and photographers alike! There are other sizes available if you need a smaller or larger bag.

Note: I receive no money from the sale or promotion of any of the items written about in this review. The opinions are mine and mine alone. I have not been paid to write this review or to endorse any of the products or companies.

For More Information & Where to Buy

Kelty Redwing 32 backpack - https://www.kelty.com/redwing-32/

Ape Case Cubeze QB39 Flexible Storage Cube @ B&H - https://www.bhphotovideo.com/c/product/903032-REG/Cubeze_QB39_Flexible_Storage_Cube_Yellow


All photos are copyright Joseph S. Valencia All Rights Reserved They may not be used in any way without express written permission of the photographer. If you wish to use any of the photos you may contact the photographer at valencia32photo@gmail.com

Monday, January 21, 2019

It's Cold. It's Windy. It's Time For The Beach!

I went out to lunch with my wife yesterday and we decided to take the long way home, driving along the ocean. When we got to Bradley Beach I could see some spray peeking over the top of the dunes so, of course, I had to stop. I didn't have my DSLR with me but had my phone and thought I would be able to get a good shot for my "365 Project" (see 2019 and my 365 Project.)

The wind was quite wicked, really whipping up the waves and blowing spray - in other words; perfect! I found a group of rocks being pounded by waves and then a small group scattered in the sand. I could tell they were still being hit by water at times but it appeared the tide was receding so I figured I was safe. I was, for the most part, right about that except I almost got wet when a couple larger waves came in at once, pushing the water further up the beach than I had previously seen. Luckily I noticed the oncoming water before it was too late - the result was this black & white image.

I was able to stay on the beach for about 10 minutes and shoot about 15 or so images before it got too cold. I was not dressed properly - this was a last minute decision so I only had a lightweight, insulated jacket and no hood. I haven't been able to find a pair of gloves suitable for photography that were warm and reasonably priced so I don't wear them when I am out - in fact, right now I don't even own a pair of gloves. I guess some day I will have to break down and buy a pair but it's hard to justify because we don't really get that many days when I absolutely need them.

I'm keeping this post short, just wanted to share a few of my images from the beach. Hopefully I have encouraged you to get out and shoot, cold, wind, rain, snow; doesn't matter, there is never a bad day to be outside shooting. Each type of weather system brings challenges - facing and conquering those challenges is what makes us better photographers.


All photos are copyright Joseph S. Valencia All Rights Reserved They may not be used in any way without express written permission of the photographer. If you wish to use any of the photos you may contact the photographer at valencia32photo@gmail.com

Sunday, December 16, 2018

Shoot or Help? A Moral Dilemma.

I recently read, and posted on Facebook, a joke that goes something like this - "If you come across a drowning man and have time to either take a picture or save him - what shutter speed do you use?" I was thinking about that this morning and decided to update and re-publish this post from March 2017, originally published on a now-defunct blogging community called Niume.

If you've been following me for any length of time you will know that photography is more than just a hobby. For as long as I can remember I have had an interest in the art but I think I can say that age 12 was when it became “important” to me. The thought of a career in photography was omnipresent but I was encouraged to pursue science, mathematics and then computers. Photography was a great hobby but you have to make a living….

I chose a career and started making a living but my desire to become a photographer continued to grow. I knew I wanted to shoot but how was I going to make a living? I gave a lot of consideration to photojournalism. Growing up I saw news images ranging from The Beatles landing in New York City to the horrors of Vietnam. There were images of the joys of victory, the unintended victims of war and the horrors of political assassinations. Most of the photographers were anonymous but their images helped shape the world. Later I would see movies like “The Killing Fields” and “Somebody Has To Shoot The Picture” which re-ignited my fascination. There are a number of reasons why I didn’t pursue a photojournalism career, not the least of which can be found in the title of this post. As a photographer, this is something I think about a lot. Social media, and televised news, is filled with videos of people in distress and my first thought is, "Why are you not helping?" Watch any news program and you will see someone who has tragically lost a loved one, they are clearly anguished and yet, someone is recording or photographing them. It is then that I wonder why they can’t just have a private moment; do we really need to memorialize this with a photograph?

In early 2017, President Trump addressed Congress; he spoke of US Navy Seal Ryan Owens who had recently been killed during a raid. His widow was there. When the President introduced her, the chamber erupted in applause. During the ovation, the camera was trained on her, her grief still fresh. It felt like an intrusion and, after a short time, it made me uncomfortable. I have had similar situations arise when covering events; participants overcome by emotion turning to others for comfort. I always consider taking the shot but rarely do.

I don’t think I can “get the shot” above all else. I’m quite good at covering the “fun stuff” but feel uncomfortable exploiting someone’s grief. When I see someone in need of assistance my impulse is to help, not shoot. I have witnessed accidents, sometimes close enough to have narrowly escaped being involved, but I don’t have a single photograph, even though the camera has been in the car. I could have quite a collection and made money selling the images to local news outlets but the camera always stayed in the car. I look back at those times, mentally taking the photographs and think of the opportunities lost. Then I think about whether I made the right decision; that is one of the easiest questions I have ever had to answer – Yes, of course I did! It is the right decision for me, that isn’t to disparage those who would make a different decision. After all, somebody does have to shoot the picture. Right?

So, what do you think? Do you shoot or help?

Image: press-1017762_1920 - https://pixabay.com/en/press-journalist-photographer-news-1017762/

Saturday, December 1, 2018

A Brief Hike Along the Appalachian Trail

Delaware Water Gap

I have driven thru "The Gap" countless times during my life and twice attempted to summit, and camp on, Mt. Tammany on the New Jersey side of the Delaware River. I say attempted because I have not, yet, succeeded. My first try was in 1985 when my friend, Bill, and I decided to take a weekend camping trip - we started up the Red Dot trail but Bill became ill and we had to turn back. A few years later I set out on a solo camping trip - made it a bit further along the trail but hurt my knee and had to wait for someone to assist me back to my car. 2018 was going to be the year I reached the summit but each planned trip got derailed for one reason or another. Last week I finally got to do some hiking on Mt. Tammany - only about 2 miles in total but I made the best of it. I had set out to do some hiking and shooting at the Black River Wildlife Management Area, specifically behind the Old Grist Mill in Chester, but when I got to Chester I decided to just keep driving up Rt 206 to Rt 80 and spend time at the Gap. It was a great decision, for more than one reason.

Dunnfield Creek Trail

As I mentioned, I had not planned to hike on Mt. Tammany (I also had the beginnings of a sinus headache/congestion) so I decided not to attempt another hike up the Red Dot trail. It was about 10:30 AM, I didn't have any food with me and only 24 ounces of water - certainly not enough supplies for an extended hike here. I parked in the Dunnfield Creek Trail parking lot, grabbed my gear and headed out onto the trail. At the parking lot there is a sign board with maps, notices, etc...; the notice that jumped out at me was about bears and what to do if you encounter one. I know there are bears in the area and there have been fatal attacks along the trail but it was still a little unnerving at first. I am always quite attentive on the trail - never listen to music and always have my head on a swivel but today I was going to be twice as attentive. I didn't get a hundred yards before the trail turned into a small stream - November was a very wet month - and I had to walk around water many times along the way. After hiking about a half mile I came to a fork in the trail, to the left you get on the White Blaze which is the Appalachian Trail and leads up or the Blue Dot which takes you down by the Dunnfield Creek. Both, ultimately take you up to the summit of Mt. Tammany and Sunfish Pond where they connect to the Red Dot Trail. I wanted to keep my feet reasonably dry, so I went to the left and up the AT. When I had hiked about a quarter mile up the trail I stopped in a small clearing to have a drink. I looked to the east and spotted a wooden footbridge spanning the creek, on the bridge was a photographer setting up a shot of the water flowing over the rocks and the small waterfalls. I decided to backtrack, brave the water and muddy Blue Dot trail and check out the area myself. That was my second good decision of the day!

The trail was wet but not quite as bad as I had thought it would be and I got to the bridge relatively easily. This was exactly what I was looking for - fast moving water, rocks and trees. The fact that the bridge was low to the water allowed me to get shots that made it look like I was in the middle of the raging water. My first images were made from the middle of the bridge with the tripod down low - a few wide-angle shots and then a five shot panorama. After taking in the overall scene I decided to get a bit tighter on some of the individual waterfalls and other interesting features. I had just finished on the bridge when I saw a hiker coming up the trail - this was the first person I had encountered. We exchanged pleasantries when he passed and we both continued with our missions; his to get to the summit and mine to capture the beauty of the surrounding area.
There are almost too many compositions in this small area and I could have spent an hour or more moving from one spot to the next. I felt like a kid in a candy store; set up a shot only to find another that was equally, or more, appealing. There is nothing quite like fast moving water to capture my attention. The raw power of the water, the sound it makes running over and around the rocks, the smell; what is there not to love? When I come across these scenes there is no question in my mind about how to capture them - small aperture and slow shutter speed. In the past I would try to get the shutter to somewhere between 15 and 30 seconds thru small apertures and neutral density filters. This gives a great, smooth, milky quality to the whitewater but I didn't want to go that far with these images and so I skipped the filters (other than a polarizer to help reduce the glare) and used apertures between f/8 and f/25. I think the longest the shutter was open was around 3 seconds and I think that was another good decision (third one so far! I was on a roll!) as it was enough to blur the water but I still got a sense of movement in the water.

I had to force myself to pick up my gear and start back down the trail towards the parking lot. I had gone thru more than half of my water and was beginning to get hungry. Notice that I "picked up" and not "packed up" my gear - I learned a long time ago not to put the camera away until I got back to the car because you never know what can happen. I didn't get too far down the trail when I came across a small rocky outcrop overlooking the creek. It was wet and had some leaves covering it but it didn't appear to be too dangerous so I decided to walk out and see what compositions might be waiting for me. The shot at the beginning of this post is the result and definitely worth the effort. This was the last time I had a good opportunity to shoot the creek until I got back to the parking lot - that's not to say there aren't spectacular views but just too dangerous to get down to the water or there were things obstructing the view. I spent about 10 minutes wandering along the bank, setting up a few shots and then getting in the car to go get lunch.

I use MapMyHike when I am out hiking and it recorded a 1.95 mile trek with a change in elevation of 315 feet and I spent just over 90 minutes along the trail. This may be the first time I spent any time exploring the area but I guarantee it will certainly not be the last. I am looking to get a better backpack so I can carry my gear, while having enough room for more water and food. A good pair of trekking poles would be quite helpful, too. I will reach the summit of Mt. Tammany and visit Sunfish Pond some day but it will have to wait until 2019. I am already looking forward to my next hike in the area, I would love to live closer so that I could go more often but it is more than 90 miles away and it just isn't practical - especially when it can get very crowded on the weekends.

If you are interested in seeing more of my images from this hike, and those in the future, follow me on Instagram (https://www.instagram.com/valencia32photo/), Facebook (https://www.facebook.com/joevalenciaphotography/) and Twitter (https://twitter.com/WanderPhotog.)

If you are looking for a great place to hike or inspiration for your landscape photography, check out the Delaware Water Gap and take a hike along Dunnfield Creek Trail. I promise you will not be disappointed.

Oh yea, at the start of this post I said that driving to the Gap was a great decision for more than one reason. As I stated, I had planned to hike in Chester and decided to do so after I had lunch. I drove to the grist mill, grabbed my gear and headed for the trail. It was impassable! The creek that ran along the trail had risen considerably and the entire area was a raging river - there was absolutely no sign of the trail anywhere. I looked around for a couple minutes thinking I might be able to get a shot or two but there was nothing. I got back in the car and headed for home.


All photos are copyright Joseph S. Valencia All Rights Reserved They may not be used in any way without express written permission of the photographer. If you wish to use any of the photos you may contact the photographer at valencia32photo@gmail.com

Sunday, November 18, 2018

And into the forest I go, to lose my mind and find my soul. - John Muir

As a regular reader of this blog - you are a regular reader, right? - you know that I collect quotes and frequently use them as inspiration for my posts. This is one of many John Muir quotes that I have collected.

I love being in the woods, if I could, I would spend a good part of every day hiking along a wooded trail. There is no other place where I can get totally lost in my thoughts, or lack thereof. You will never see me with headphones on or playing music, the only sounds I am looking for are the singing of the birds or the leaves rustling. It's all about nature and recharging my soul.

A few years ago I was interviewed by a fellow blogger, one of the questions he asked was "What do you think about when you’re by yourself?". My answer, in part, was "When I am out for a hike in the woods I try not to think but to listen." My hearing is very poor but I am fortunate that the "sounds of nature" are of such a pitch that I can hear much of it. I can hear the birds, I can hear the leaves or a twig snap under foot. This is the Earth's music and nothing is more soothing.

Autumn is, for me, the best time to lose myself in the stillness that is the forest. The beauty of the changing leaves is just a part of the allure - during the fall, deer go into rut and are far more visible while out on the trail - including the elusive buck. If you pay attention you will also find squirrels and chipmunks busily preparing for the cold winter months but it is the smell of autumn that is the biggest draw. There is something wonderful about the smell of the woods when the ground is covered in leaves; this is when the urge to go camping becomes almost unbearable. You know the smell, don't you? That "earthy" smell of dirt, mixed in with wet, decaying leaves. I've also recently learned that things smell differently when the temperature lowers so maybe the smell is there year round but only noticeable in the cooler weather. Eh, who cares? If I could bottle it and use it as cologne I would.

November 17th is National Take a Hike Day and I usually try to find a way to spend time in the woods somewhere but this year it came and went without a hike. This year I simply forgot. It's been that kind of year, especially the last couple months; it seems that I have been focused on other things lately. I am going to have to try harder to make time to get out and visit my favorite trails.

I'm going to keep this post short, I wanted to share this quote with you along with a couple of my favorite self-portraits shot along the trail. Do you enjoy the forest as much as I do? What time of year do you like best? Why? Where is your favorite woodland hike? I'm always looking for somewhere new to explore. I would love to hear from you - leave a comment below.


All photos are copyright Joseph S. Valencia All Rights Reserved They may not be used in any way without express written permission of the photographer. If you wish to use any of the photos you may contact the photographer at valencia32photo@gmail.com

Wednesday, October 3, 2018

Slow Exposures at the Beach in Ocean Grove

Slow Exposures at the Beach

Ah.... Autumn is here and that means I get to start going to the beach again! Yes, I know, most people go to the beach in the summer. That's why I wait until after the summer - the crowds are gone and, often, I can have the beach to myself. I'm also not one to "sunbathe" - I go to shoot. I like shooting long exposures, especially when there is moving water, but here I am talking about "slow", not "long" exposures. These images were shot between 1/3 and 1/13 second; I will give exposure information at the end of the post.

The Fishing Pier

I recently took some vacation time and my wife and I went to Ocean Grove late one afternoon. The day was hazy and hot with a rather strong breeze - the landscape was flat and dull but I had my gear with me and was determined to shoot. In my years as a landscape photographer I have learned to make lemonade from lemons; when the grand landscape is unphotogenic, it is time to look small and get tight. The tide was rising which was to my advantage, as was the strong breeze.

If you are familiar with the pier at Ocean Grove, you may remember the shack at the end where the fishing club met and fished. (You can see a couple images of the old pier in my blog post titled, God's Square Mile - Ocean Grove, New Jersey) The pier was destroyed in 2012 when Superstorm Sandy blew thru; most of it was rebuilt but they stopped short at where the shack was located. Today there are some of the original pilings and a few broken ones. I decided to concentrate on a broken one that was being hit by incoming waves.

It seemed as though Mother Nature knew what my plans were and decided to have some fun at my expense. As soon as I got my gear set up and decided on my composition, the breeze subsided a bit and the waves lessened in their size. The water was still getting to the broken piling but there was nothing dramatic. I have been playing this game too long to think it was going to be easy - one of the first things you learn about landscape photography is that conditions are always changing and there are no guarantees.

It didn't take long before the wind picked up and waves started coming in a bit bigger. Still, I wasn't getting the violent crash with a great amount of spray that I was looking for. It took 10 or 15 minutes of nothing and "near misses" before I got the shot labeled "Fishing Pier #1". It looked good on the back of the camera but I took a few more, just in case. I liked that particular piling but wanted to try a different composition so I moved back a bit towards the end of the pier. My original idea was to frame the broken piling with new ones on either side - it wasn't a bad composition but I think the image labeled "Fishing Pier #2" is better. You can see shadows of the other pilings and tell that it was quite late in the day.

The Jetty

Just to the north of the pier is a small jetty - you can see some of it in Fishing Pier #2. I tried a few images after I finished with the pier but wasn't happy with the way the water was playing with the rocks. I went back a couple days later to re-focus on the jetty and came away with the images presented here. The wind wasn't blowing nearly as hard as previously and the tide was a bit higher and still rising. My goal was still to get crashing waves and dramatic spray but I also wanted to capture some fluidity in the water. I wanted some flowing over and around the rocks. In some ways shooting the jetty was easier and in others it was harder. It was easier because the conditions were better and I had far more compositions to choose from. It was more difficult because it was a more complex subject and that made predicting how the water would act a lot more challenging.

There were times when I caught a nice splash but the pooling water didn't look quite right or water spilling over the rocks completely obscured them. Other times I had some great flow but there was no splash. The images shown here were shot on the north side of the jetty, I moved to the other side before leaving but there were no images to be had; the water was breaking from the north and so the waves were not crashing over the rocks on the south side of the jetty. I did a few test shots of the rocks at the south tip - the ones you can see in "Fishing Pier #2" - but there was nothing, nor did I get any good images when I got on top of the jetty and shot out to sea.

In Conclusion

Overall, I would say that both sessions were successful but they left me with wanting more. I can't wait to get back to the beach and explore more possibilities with both the pier and the jetty. There are other jetties along the Ocean Grove beach and I will explore them, too. Other towns have their own piers and jetties, each with their own unique characteristics. There is also the option of using long exposures - 10, 20, 30 seconds or more. The longer exposures will require using neutral density filters and while I do have a set of filters, stacking them to give me exposures of those lengths can cause issues (see my review of the filters - Product Review: Formatt-Hitech Filters) so it may be a while before I can plan the really long exposures. I also want to do some long exposures - in the range of 1 to 10 seconds - during sunrise and sunset.

What experience have you had shooting slow exposures? Have you shot at the beach like I did or some other subject? I would love to hear your thoughts and experiences - leave a comment below.

Exposure Information

ImageShutter speedApertureFocal length
Fishing Pier #11/13 secondf/16100 mm
Fishing Pier #21/10 secondf/3241 mm
The Jetty #11/3 secondf/2231 mm
The Jetty #21/5 secondf/2221 mm
The Jetty #31/3 secondf/2219 mm

All photos are copyright Joseph S. Valencia All Rights Reserved They may not be used in any way without express written permission of the photographer. If you wish to use any of the photos you may contact the photographer at valencia32photo@gmail.com

Monday, September 10, 2018

Should We Teach the "Rules" of Photography to Beginners?

The other day my friend, Bill, sent me this article - 5 Rules in Macro Photography and When to Break Them. I have been doing a bit of macro work lately, so he decided to share the article. He sent it to me via Facebook Messenger and, after I read thru it, we had a brief discussion about it. The article, and discussion, lead me to writing this blog post. I have seen countless articles with the same message - "here are the rules, you should always follow them unless you should break them." There is always an exception to the rule and, in photography, there seem to be more exceptions than rules.
To consult the rules of composition before making a picture is a little like consulting the law of gravitation before going for a walk. – Edward Weston
This is one of my favorite quotes and I think it is appropriate here. I'm not saying that the "rules" aren't important - they are, to an extent - but I am wondering about when they should be taught. I have seen many photographs that were technically spectacular and, yet, dull and lifeless. When I say "technically spectacular" I mean they followed the rules. I know, part of the rule is knowing when to break it but do most photographers learn this second part? When do you start to teach them to break the rules? Should we call them something other than "rules"?
The photographs that excite me are photographs that say something in a new manner; not for the sake of being different, but ones that are different because the individual is different and the individual expresses himself. - Harry Callahan
Bill and I came to an agreement that the rules should be taught but later in a photographers development cycle and maybe not be called rules at all. I think if we teach how someone looks at a photograph, how the eyes scan and are drawn to certain things, how the relationship between light and dark works; then the student will simultaneously learn the rules and the exceptions. They will know the "why" which is far more important than the "what", in my opinion anyway. Photography, after all, is art - right? Art is a means of self-expression and who is to tell us how to express ourselves?
I don’t think there’s any such thing as teaching people photography, other than influencing them a little. People have to be their own learners. They have to have a certain talent. – Imogen Cunningham
It's all about capturing a moment in time as witnessed by the photographer. We all see things differently and every scene means something different to us. I have met some photographers who are very much into following rules and the "technical" aspect of photography; their work is nice but can be a bit boring. I had one lament about how lazy and stupid some people were because they didn't know how to read a histogram! I told him that I didn't always consult the histogram when I was out shooting and he became insulting. I ended the conversation when I asked him about consulting the histogram when you shoot film.... So, am I saying that we should throw caution to the wind and not learn the "rules" of composition? No, not really. I just think that maybe we should de-emphasize them or teach them a different way. The word "rule" implies rigidity and we should be emphasizing creativity. I know, there are times when the rules much absolutely be followed, without exception. Sure, there are disciplines within photography where certain rules must be followed but I am talking about those learning the craft; there is plenty of time for specializing.
You don't make a photograph just with a camera. You bring to the act of photography all the pictures you have seen, the books you have read, the music you have heard, the people you have loved. - Ansel Adams
I think this is a good place to end. What do you think about teaching the rules to beginner photographers? Are you a teacher? What is your approach? I would love to hear your thoughts - leave me a comment below.

Until next time, get out, enjoy nature and break a few rules!

Monday, August 27, 2018

Product Review: Vello Macrofier for Canon EOS (UPDATED!)

Vello Macrofier

This review is not sponsored, nor is it commissioned by the manufacturer. I requested, and received, the equipment for the purpose of producing a review on my YouTube channel - you can check out the review here.

What is it?

The Macrofier is a third-party lens accessory made by Vello (http://www.vellogear.com/) for use with the Canon EF/EF-S lens systems. It can be be used as a set of automatic extension tubes or a lens reverse-mount system; both are a means of achieving macro photography with non-macro lenses or to achieve greater magnification with macro lenses1.

When you reverse-mount the lens you can get incredibly close, as you can see in the first image. This is a Canon 18-135mm EF-S lens reverse-mounted. The inscription on the lens states the closest focusing distance is 1.5 feet (.45 meters) but with the lens reversed I am just an inch or so away. Extension tubes work in the same way - by moving the lens away from the camera body you can achieve closer focus.

First Impression

When I opened the box I wasn't quite sure what to expect - I had seen the product photos on B&H and the Vello website but, often, the product doesn't necessary live up to it's "image." I was pleasantly surprised to find it was exactly what I saw in the pictures. It appeared to be well-made and sturdy. It comes with seven (7) adapter rings (52 mm, 58 mm, 62 mm, 67 mm, 72 mm, 77 mm, 82mm) to fit just about any lens you may have. The Macrofier, itself, is packaged in a bubble-wrap bag inside the box. The one thing I noticed was that there were now caps for the device - this isn't a big deal but I was a little surprised. I just ordered a body cap and lens cap to put on it when it is stored in my bag. The rings are solid and flat - I mention that because I have purchased other adapter rings in the past that were not quite flat and were difficult to use.

In The Field

Extension Tubes

I looked in the owner guide and website but could not find a definitive answer to the question - How much extension do you get? I was able to find a review on the B&H website where a reviewer reported that, by his calculations, it is about 35mm. Using the Macrofier as a set of extension tubes couldn't be easier - using the threaded ends, you just screw the two halves together, mount one end on the camera body and the lens on the other end. You can also mount the Macrofier on the lens, then mount the assembly on the camera - doesn't really matter. When using extension tubes, you can (probably) get away with hand-holding but I would suggest using a tripod whenever possible. Macro photography produces notoriously shallow depth of field and trying to hold steady is difficult, at best. That said, I have successfully hand-held with the extension tubes.

Reverse-Mount

For me, this is where the fun really begins and you will definitely want to use a tripod. To use the Macrofier to reverse-mount your lens, the two parts have to be separated. Mount the one end on the camera body, screw the appropriate adapter ring onto the half attached to the camera, screw the lens onto the adapter and, finally, attached the second half of the Macrofier to the back end of the lens. This will allow you to work incredibly close to your subject - depending upon the lens. You can see in the initial image that I am about an inch (or less) from the mushroom which will give you more of an "abstract" image, as shown in the image to the left. Working outside at this magnification can be more than a bit tricky because you are battling the elements. Your depth of field is virtually non-existent and so even the slightest movement will kill the image; it took a while for this mushroom to stop moving despite a nearly imperceivable breeze.

I set up a light tent in my studio to do some macro work. You can read more about this session here - Equipment Review: Vello Macrofier for Canon EOS. Working under studio conditions is much easier because you have full control over everything and can take a long as you need to set up and execute a shot.

Final Thoughts

If you have been wanting to get into macro photography and couldn't justify the cost of the macro lens, spend $99.95 and buy a Macrofier. I promise that you will be happy with your decision. I am very happy with the Macrofier and have a lot of work planned for it. The auto-focus works, though it can be difficult at times which is a function of the lens, and the auto-exposure is good, too. It is well-made, solid and ridiculously easy to use. The only "negative" thing I can say is that I am upset that I didn't get one years ago! Yes, I mean that. I have been wanting a true macro lens for quite a while but the price made them a low-priority. I would, still, like to have a true macro lens (or two) some day but for the foreseeable future the Macrofier is all that I need.

I have also used some of my older Canon FD lenses - everything is manual but works just as well. I am able to do this because I bought a lens attachment a few years ago that allows me to mount my FD lenses on my EOS Rebel T3i.

If you own a Nikon, or other brand, you cannot use the Macrofier as-is; it is only available for Canon EOS line of cameras. If you do own a different brand, you may want to buy a Canon-to-brand X adapter which should allow you to use the Macrofier as a reverse-mount device - you would need two (2) adapters to use it as an extension tube. If you do this, you do so at your own risk - I have not tested this, nor have I found evidence of anyone else doing it. I have no idea if it will work but, in theory, it should.

For More Information & Where To Buy

So, there you have it. If you would like more information on the Vello Macrofier, you can check out their website - click here. While you are there, check out the other accessories that Vello makes, including their "lens adapters" that may allow you to use the Macrofier with your other brand, as described above.

You can also check it out, and purchase it, at B&H Photo - click here.

UPDATE

After I wrote this review I recorded a YouTube review, at one point demonstrating the Macrofier. I experienced a bit of trouble mounting and removing the device from the camera. I later discovered that a screw was loose and the head was slightly above the service of the mounting plate. I was able to secure it and it seems to be okay. I reported this to the manufacturer and asked if this was a common complaint - the response was that this was the first instance they had heard of. They offered to replace the device with a new one - since I was able to tighten the screw myself I declined, in part because I want to see if it happens again.

I believe this to be an isolated incident and it in no way changes my overall opinion or recommendation of the Macrofier. The YouTube review can be seen here - https://www.youtube.com/watch?v=v-qJJ4Tb0h4&t=1s


All photos are copyright Joseph S. Valencia All Rights Reserved They may not be used in any way without express written permission of the photographer. If you wish to use any of the photos you may contact the photographer at valencia32photo@gmail.com


End Notes

  1. I have not tested this equipment with "macro" lenses and have no first-hand knowledge of their performance with this accessory.


Featured Post

Macro (and Close-Up) Photography - A Whole New World

Macro (and Close-Up) Photography - A Whole New World All photos are copyright Joseph S. Valencia, All Rights Rese...